GARAGE DOOR REPAIRS AND THE AVERAGE COST In 2025
Most Common Types of Garage Door Issues
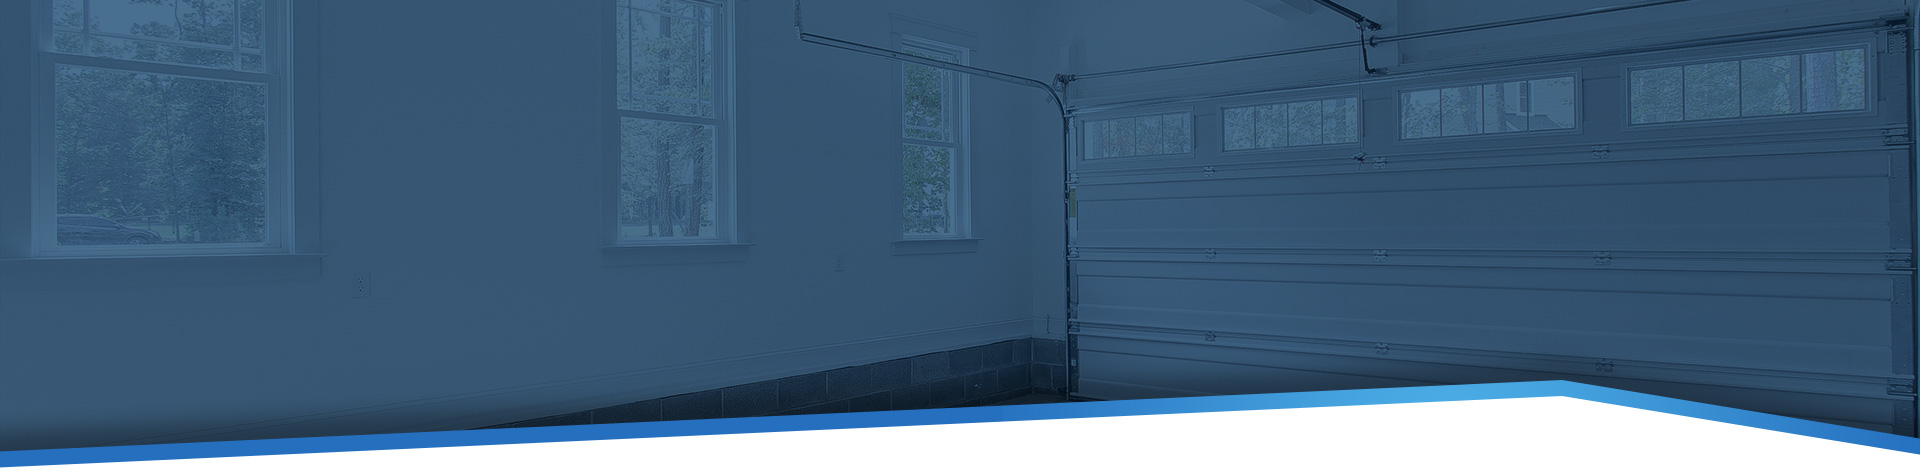
Garage doors are an essential part of any home, providing security and convenience. However, like any mechanical device, they require regular maintenance and occasionally some repairs. In this blog, we delve into the world of garage door repairs, breaking down the process, tools, and costs involved in keeping your garage door in prime condition. Whether you're a DIY enthusiast or prefer professional help, understanding these elements will help ensure your garage door remains functional and reliable.
1. Understanding Common Garage Door Issues
Garage doors in Visalia, California, face a variety of issues throughout their lifespan, and catching these problems early can save you not only time but also money. Common concerns include bent, loose, or misaligned tracks; worn-out rollers; cracked hinges; torn or dried rotted bottom seals and weather stripping; and worn-out or broken torsion springs. Interestingly, the most frequent service calls we receive from our customers in Visalia are related to photo eyes or safety sensors. Misalignment of tracks can often stem from obstructions, leading to jerky movements or, in some cases, completely inoperative. Faulty sensors, which are vital for safety, might cause the door to reverse unexpectedly, creating hazards for your vehicle and loved ones. Maintaining hardware such as hinges and rollers is essential, and it's recommended to do this at least biannually. Springs, particularly torsion springs, tend to wear out over time, making it increasingly difficult for the door to open or close smoothly. Additionally, if your garage door opener in Visalia suddenly stops working, it could be due to remote control issues or worn gears within the mechanism. Extreme weather can also play a role, potentially warping or cracking your garage door. Promptly addressing these issues is vital for maintaining your door's efficiency and safety. If you begin to hear unusual sounds, such as screeching or grinding, it's a prompt to check lubrication levels or explore potential mechanical failures. Regular inspections can help catch these problems before they escalate. Throughout this blog, we will delve into every type of garage door repair service call in Visalia, covering both routine and irregular issues. We’ll go over the causes, the fixes, and preventative maintenance, along with estimated costs related to garage door repairs, including overhead garage door cable repair, overhead garage door belt repair, and more. We will also provide a DIY difficulty rating from 1 to 10 for each repair, ensuring that you have a comprehensive understanding of what to expect when taking on these tasks.
2. Tools You Need for Garage Door Repairs
Having the right tools in your toolbox is key to tackling garage door repairs like a pro. For the basics, you’ll want to stock up on screwdrivers, wrenches, and pliers because they’ll cover your everyday repair needs. If you're getting into the nitty-gritty, like adjusting or swapping out springs, make sure to grab some winding bars—they're a game-changer for managing all that tension safely. A cordless power drill? It's definitely a time-saver when it comes to removing panels or putting in new hardware. Don't forget about some other must-haves: vice grips, rubber gloves, safety glasses, and a sturdy frame ladder. Trust me, a frame ladder beats an extension ladder for stability any day. Slip-proof work shoes are a smart move to keep you safe while you’re at it. You’ll need a torpedo level to ensure your garage door tracks are spot on, and having both rough and smooth sandpaper handy will help you tidy up any rough edges. A metal file and a battery-operated impact wrench are also great additions. When it comes to wrenches, you'll want to make sure you've got a solid socket set that covers sizes from 1/4 to 3/4 inches. And don’t skimp on the ratchets—having a range from 3/8 to 9/16 inches will really come in handy. A magnetic 7/16 socket is a nice little trick to have up your sleeve, too! For those times when you need to get everything perfectly aligned, a digital level is a game-changer for making sure your garage door tracks are spot on. If you ever find yourself facing electrical gremlins, a multimeter can help you troubleshoot any issues with the opener. Oh, and don’t forget a trusty hammer and a rubber mallet—they both have their moments where they shine! Safety gear is non-negotiable! Seriously, having gloves and safety glasses on hand is super important, especially when you're around metal parts or working with high tension. Even if you think you're the DIY superstar, it's always wise to play it safe—after all, it's better to be safe than sorry, right? So, stock up on the right tools and keep that safety-first attitude in mind. This way, you’ll not only tackle your repairs with confidence, but you'll also have some peace of mind while you work. If you tend to be a bit accident-prone, I’d suggest stashing a few Band-Aids in the garage, just in case. Parts can get sharp over time, and I'm just looking out for you—not trying to put a damper on your DIY adventures!
3. Skill Levels Required for Various Repairs
Repairing garage doors in Visalia, California, can vary in difficulty, but don't worry! Knowing where you stand with your skills is important before jumping in. If you’re new to the DIY scene, you’re in for some fun! There are plenty of easy tasks out there, like giving those moving parts a nice lubrication or tightening up some loose bolts, which are perfect for beginners. These tasks fit right into the DIY level of 1-4. You can tackle these without breaking a sweat—all you need is a wrench and a can of lubricant. It’s pretty amazing how a little maintenance can keep your garage door running like a champ and extend its life! Once you get the hang of those basic tasks, you might want to step it up a notch. Taking on intermediate challenges like replacing door rollers or adjusting the garage door track alignment falls into the DIY level of 4-7. These require a bit more know-how and hands-on experience, but with the right tools and a positive attitude, you can absolutely handle it. Just take your time, follow the instructions carefully, and maybe check out a tutorial or two before diving in! Now, if you're thinking about tackling advanced repairs like garage door hinge replacement or replacing torsion springs, that’s when things can get a little tricky. Tasks rated at a DIY level of 7-10 come with some real risks. Torsion springs are under a ton of tension, and if you mess with them the wrong way, you could damage your garage door or even hurt yourself. The electrical stuff in garage door openers can be complicated, too. If you’re feeling nervous about it, that’s completely normal, and it’s totally okay to call in a pro for those jobs. It’s always best to err on the side of caution when it comes to complex fixes. So, whether you’re just starting out or already have some experience, honesty about your skills is key before you dive into any repairs. This approach not only ensures that your repair gets done but that it’s done safely and correctly, minimizing the chances of injuries or mistakes that could make things worse down the line. Remember, safety first! Keeping your tools organized and knowing your comfort level can turn what seemed like a daunting task into a manageable project. Plus, you'll gain confidence with each repair you tackle, ensuring your garage door in Visalia stays in prime condition without breaking the bank on costly professional services.
4. Common Garage Door Repair Type and Average Cost
GARAGE DOOR HINGES REPLACEMENT: DIY LEVEL 1-3
When it comes to hinge replacements in Visalia, CA, each hinge generally costs between $20 and $30, depending on the gauge of steel used. The labor component typically runs from $100 to $200, influenced by the going rates in the area and the number of hinges being replaced. Given that this region often faces challenges like dust and wear from weather conditions, it's wise to routinely check hinges, as they can wear out faster under such circumstances. If you’re doing a full set of hinge installation, anticipate that the total process may take about 1 to 2 hours, especially if you’re including changes to the top and bottom fixtures. Do yourself a favor and change the rollers at the same time; dust can wreak havoc on these components, and addressing them together can save you on labor costs. Remember, rollers are critical for ensuring your garage door runs smoothly, so don't skimp on the quality of these items. A good set of nylon ball bearing rollers (10) typically costs around $8 to $15 each, and labor for their installation will range from $100 to $150.
GARAGE DOOR ROLLERS REPLACEMENT: DIY LEVEL 1-3
When it comes to replacing garage door rollers, this task is generally considered fairly easy and falls within a DIY level of 1 to 3. Replacing the rollers is essential for ensuring that your garage door operates smoothly, and it’s something you can often handle yourself without too much hassle. The parts can typically cost between $8 and $15 each, depending on the type and quality you choose. Additionally, the labor cost, if you decide to call in a pro, would range from $100 to $150 for installation. Here's the thing: while swapping out the rollers at the top of the door is manageable, do not attempt to replace the rollers at the bottom of the door. That’s a different ballgame and requires a much higher DIY skill set, rated at a 7 to 10! Bottom rollers are often connected to the cables and torsion springs, which hold a significant amount of tension and can pose safety risks if handled improperly. So, stick to those upper rollers for your DIY adventure, and save the more complex work for the pros. Regularly maintaining your rollers can enhance the overall performance of your garage door, making it more reliable and extending its lifespan. Plus, you'll feel great after successfully completing this straightforward repair!
GARAGE DOOR TORSION SPRING REPLACEMENT: DIY LEVEL 10
When it comes to replacing a torsion spring, it's essential to leave this task to the professionals unless, of course, you're highly experienced and equipped with the right tools. This isn't something to take on casually during a weekend DIY project; it's critical to approach it with a mindset geared toward safety. First, the old spring must be unwound with care, followed by the precise winding of the new spring to the proper tension. A misstep can lead to serious injuries, making it vital to monitor your springs regularly. If you notice any strange behavior in your garage door, such as erratic movements, it's a strong indication that it's time to call in an expert to inspect those springs. Investing in high-quality springs and ensuring they're well-maintained can prevent significant headaches—and expenses—down the road, keeping your garage door functioning smoothly and safely. The average cost for replacing torsion springs typically ranges from $150 to $200 for parts alone on a 2-car garage door. When factoring in labor, the total cost usually ranges from $300 to $500. Given the relevant risks associated with this repair, choosing to hire a professional is an advantageous decision. Skilled technicians not only have the necessary tools and experience to handle the job safely, but they are also trained to deal with any hidden issues that could arise during the repair process. 10-year and 20-year springs are also available at an additional parts charge only; labor is the same. By opting for quality parts and professional installation, you can enhance the longevity of your garage door system, minimizing the likelihood of future malfunctions. It's essential to regularly monitor your garage door's performance and be proactive about repairs; this approach ensures you avoid larger repair costs and maintain the security of your home. Keeping your garage door in top shape is key to the overall safety and convenience of your home in Visalia, California, and staying informed about maintenance can empower you to make the best decisions for your property. Regular evaluations, especially of critical components like torsion springs, will keep your garage door operating efficiently while providing peace of mind regarding your home's security. When budgeting for garage door repairs, it's important to consider both parts and labor. Replacing a broken spring typically ranges from $150 to $200 for parts, with labor costs bringing the total to approximately $350 to $650.
(More information on Garage Door Spring Replacement)
SECTIONAL GARAGE DOOR EXTENSION SPRINGS REPLACEMENT: DIY LEVEL 10
Replacing garage door extension springs is one of the more complicated repairs you might face, and it comes with significant risks. These springs help lift the door and are under a considerable amount of tension. Attempting to replace them without proper training is not just challenging; it can lead to serious bodily damage or even death if the springs snap or if you're caught in the mechanism. The DIY skill level for this task is rated at a 10, meaning it’s only recommended for those who have the right knowledge and tools. The average cost for parts typically ranges from $100 to $200, but when you factor in labor, the total cost could reach anywhere from $300 to $500. Given the intricacies involved and the dangers posed, we cannot emphasize enough the importance of considering professional assistance for this repair. Safety should always come first, and with the potential for severe injuries, there's no harm in letting trained experts handle the job.
TIP UP GARAGE DOOR - ONE PIECE DOOR EXTENSION SPRINGS REPLACED: DIY LEVEL 7 - 8
Replacing the extension springs on a tip-up garage door, which often comes as a one-piece structure, really requires some focused attention. With a DIY level of around 7 - 8, this task can get pretty challenging since those springs are under significant tension. If you're not careful and something goes wrong, it could lead to a dangerous situation. So, it’s super important to handle these springs with the respect they deserve! If you think you’re up for it, ensure you have the right tools. This includes safety gear like sturdy gloves and goggles to protect yourself while you work with those heavy components. Before you get started, it's crucial to safely remove the old springs. Once that's done, you can carefully detach them from their mounting points. When it comes time to install the new springs, it's essential to ensure they're positioned just right to keep everything functioning smoothly. This all needs to be accomplished while the door is in the up position, unlike the torsion spring replacement process. If you're attempting this for the first time, don’t hesitate to look up guides or tutorials — the more informed you are, the better! Remember, while this may be something you feel ready to tackle on your own, it often makes sense to consider calling in a pro for this job. They have the experience to handle the tricky aspects and ensure the job is done both safely and correctly. In terms of costs, expect to shell out around $100 to $200 for the parts needed. If you decide to hire someone, you should budget an additional $200 to $400 for labor. Always prioritize your safety first!
GARAGE DOOR HOLMES- E900 ASSEMBLY REPLACEMENT: DIY LEVEL 8-10
When it comes to assembly replacement for the Garage Door Holmes-E900, this task falls into the advanced skill set category, rated at a DIY level of 8-10. Handling this assembly requires a good understanding of the garage door system and the specific components involved. The Holmes E900 model is known for its reliability, but even the best systems may require the replacement of certain assemblies over time due to wear and tear or accidental damage. Before diving into an assembly replacement, ensuring you have the right tools is vital. A socket set, screwdrivers, and pliers are indispensable for this job, along with a level to ensure everything is aligned perfectly once you complete the installation. Safety gear is also a must; wearing gloves and safety glasses will protect you as you work with metal components. Be prepared to devote several hours to this task, especially if it's your first time dealing with this type of repair. If you feel uncertain at any point, don’t hesitate to reach out to a professional for help. It's always better to get expert assistance than risk causing further damage to your garage door system. In terms of costs, the average expense for parts alone can range from $300 to $500, depending on the supplier and any features you may choose for the upgrade. Labor costs generally add another $300 to $600 to the total, as this process can be intricate and may require more time and specialized knowledge to ensure everything is installed correctly and safely. By prioritizing regular maintenance and quick responses to any anomalies, you can prolong the life of your garage door assembly and minimize those costly repairs. Remember, keeping an eye on your garage door's performance isn’t just a matter of convenience; it’s about ensuring the safety and functionality of your home, particularly in regions like Visalia, where garage doors face unique challenges due to the local climate and conditions. So, whether you're looking to upgrade or simply replace a worn-out assembly, knowing what to expect can make a huge difference in saving you time and money in the long run.
TORSION SYSTEM REPAIRS - SPRING LINE: DIY LEVEL 7-10
The following repairs are what we call "Spring Line" repairs because the springs are unwound and possibly removed to complete the job. It's an involved procedure, so the labor is the same as for a spring replacement.
GARAGE DOOR BEARING REPLACEMENT: DIY LEVEL 7-10
GARAGE DOOR HEADPLATES REPLACED: DIY LEVEL 7-10
GARAGE DOOR BEARING REPLACEMENT: DIY LEVEL 7-10
GARAGE DOOR HEADPLATES REPLACED: DIY LEVEL 7-10
Headplates hold the bearing. Replacing garage door bearings is a task that falls within the advanced DIY skill level, rated at a solid 7-10. This repair requires a good understanding of how the garage door system operates and precise handling skills, particularly because the springs may need to be removed, and you must ensure that the tension is completely released before starting. The process begins with safely securing your garage door in the down position. You may need to remove the springs—this is crucial, as they hold a significant amount of tension. It’s vital to unwind them slowly and methodically to prevent injuries if they snap back unexpectedly. Once the springs are properly handled and out of the way, you can access the bearings. Ensure you have the right tools on hand: a socket set, screwdrivers, and a good pair of pliers are indispensable. You'll also want to have safety gear like gloves and goggles to protect yourself from any debris that may get dislodged during the process. As you start the replacement, carefully detach the worn bearings from their mounting positions. It’s crucial to take note of how everything is assembled so that you can replicate it later with the new parts. When installing the new bearings, position them accurately to ensure smooth operation once everything is back in place. Double-check alignment—you don't want any wobbling or misaligned tracks that could cause issues down the line. After replacing all worn bearings, it’s essential to reattach and tension the springs correctly, once again taking extra care to handle these components with the respect they deserve In terms of costs, expect to pay for quality bearings, which generally range from $15 to $30 each, depending on the type and brand. Labor costs for this type of job usually range from $200 to $300, bringing the total to around $250 to $450. Given the complexity and safety risks involved, many homeowners opt to hire professionals for this task—an investment that can save you time and potential injury while ensuring the job is done correctly. Remember, working on garage doors can be tricky, and if you feel at all uncertain about managing the springs or any part of the repair, don't hesitate to call in a professional. It’s always better to prioritize safety and ensure everything is installed properly for the continued functionality and reliability of your garage door system.
GARAGE DOOR DRUM REPLACEMENT: DIY LEVEL 8-10
When it comes to replacing garage door drums, it’s crucial to recognize that this task falls within the advanced DIY skill level, rated at 8-10. The process requires keen attention to detail and a thorough understanding of your garage door system. You’ll need to unwind the springs carefully, a step that demands utmost caution. Remember, the springs hold tremendous tension, and if mishandled, they pose serious risks. Additionally, as you handle the drums, be mindful that they can develop razor-sharp edges from wear over time. If you're not careful, these sharp edges can lead to accidents. Always wear appropriate safety gear, including gloves and goggles, to protect yourself from potential injuries. To start, safely detach the old drums by unwinding the springs with meticulous attention to detail. Use winding bars to manage the tension properly as you work, ensuring a secure grip. Once the old drums are removed, inspect the new ones for any defects before proceeding with the installation. This is the moment where staying organized and deliberate in your actions will pay off, ultimately preventing mistakes that could lead to functional issues later. the new drums requires you to secure them tightly in place. Ensure that all components are aligned correctly and that there’s no misalignment that could cause operational problems down the line. Once everything is back together, take a moment to double-check that everything feels secure before re-engaging your garage door system. Given the complexity and safety risks associated with this repair, many homeowners opt for professional assistance. Should you choose to hire someone, expect to budget for both parts and labor—typically around $300 to $600, depending on your specific garage door setup and the area you’re in. Prioritizing safety and quality during this repair will not only ensure a functioning door but will also provide peace of mind for years to come. Remember, garage doors play a vital role in your home’s security and convenience, so treat every repair with the seriousness it deserves.
Replacing the torsion tube on your garage door is no small task; it's a job that requires considerable skill and caution, often falling into the advanced DIY category. Before you can even think about removing the old torsion tube, the torsion springs must be carefully unwound, a process that demands respect for the powerful tension these springs hold. This isn't an afternoon project to take lightly; safety should be your top priority, and having the right tools on hand makes all the difference. Ensure you're equipped with winding bars, and don’t skip out on essential safety gear like gloves and goggles. The last thing you want is an injury while you’re handling heavy metal components.
Once you've unwound the springs, the next step is to remove the old torsion tube. Exercise caution while detaching it from the mounting brackets—approach this methodically to prevent any mishaps. After installing the new torsion tube, new springs will need to be carefully positioned and adjusted to ensure smooth operation. You might find it helpful to consult professional advice or tutorials online for this complex process. Regarding costs, parts for the torsion tube replacement typically range from $100 to $200. If you choose to hire professionals, budgeting an additional $200 to $400 for labor is wise due to the inherent risks involved. Ultimately, unless you’re very confident in your DIY abilities, it’s usually prudent to leave this repair to CSLB-licensed and insured experts like Garage Door Repair and Installations Company, who can ensure your garage door operates safely and effectively and protects you from any liability.
GARAGE DOOR BOTTOM FIXTURE REPLACEMENT: DIY LEVEL 8-10
Replacing the bottom fixtures on your garage door is no walk in the park—it’s like climbing a mountain rated between 8 to 10 on the DIY difficulty scale. These fixtures play an essential role, acting as the bridge that connects the cables to the spring line of your door. This means that any work around them requires a solid grasp of how the entire garage door system functions, especially when it comes to managing the spring line. Before diving into this project, keep safety at the forefront of your mind. You must release all tension in the system, which involves a careful unwinding process. Rushing through this could lead to serious injuries, so don’t forget to suit up in thick gloves and protective goggles. You wouldn't want to get caught in a tight spot without proper safety gear when handling these high-tension components.Once you've secured your garage door in the down position, begin by freeing the cables from the tension of the existing springs attached to the bottom fixtures. Take your time and work with patience—this is not a race! With the old fixtures removed, gently install the new ones, meticulously ensuring everything is aligned to avoid complications later on. After replacing the fixtures, give everything a thorough check to confirm that it's all secure and positioned just right before re-engaging the springs. And remember, if you ever feel overwhelmed or unsure, don’t hesitate to call in the professionals. The right experts can handle the job safely and get everything functioning smoothly, allowing you to keep your garage door system in top shape without risking your safety in the process.
TORSION TUBE REPLACEMENT: DIY LEVEL 10
Replacing the torsion tube on your garage door is no small task; it's a job that requires considerable skill and caution, often falling into the advanced DIY category. Before you can even think about removing the old torsion tube, the torsion springs must be carefully unwound, a process that demands respect for the powerful tension these springs hold. This isn't an afternoon project to take lightly; safety should be your top priority, and having the right tools on hand makes all the difference. Ensure you're equipped with winding bars, and don’t skip out on essential safety gear like gloves and goggles. The last thing you want is an injury while you’re handling heavy metal components. Once you've unwound the springs, the next step is to remove the old torsion tube. Exercise caution while detaching it from the mounting brackets—approach this methodically to prevent any mishaps. After installing the new torsion tube, new springs will need to be carefully positioned and adjusted to ensure smooth operation. You might find it helpful to consult professional advice or tutorials online for this complex process. Regarding costs, parts for the torsion tube replacement typically range from $100 to $200. If you choose to hire professionals, budgeting an additional $200 to $400 for labor is wise due to the inherent risks involved. Ultimately, unless you’re very confident in your DIY abilities, it’s usually prudent to leave this repair to CSLB-licensed and insured experts like Garage Door Repair and Installations Company, who can ensure your garage door operates safely and effectively and protects you from any liability
GARAGE DOOR BOTTOM FIXTURE REPLACEMENT: DIY LEVEL 8-10
Replacing the bottom fixtures on your garage door is no walk in the park—it’s like climbing a mountain rated between 8 to 10 on the DIY difficulty scale. These fixtures play an essential role, acting as the bridge that connects the cables to the spring line of your door. This means that any work around them requires a solid grasp of how the entire garage door system functions, especially when it comes to managing the spring line. Before diving into this project, keep safety at the forefront of your mind. You must release all tension in the system, which involves a careful unwinding process. Rushing through this could lead to serious injuries, so don’t forget to suit up in thick gloves and protective goggles. You wouldn't want to get caught in a tight spot without proper safety gear when handling these high-tension components. Once you've secured your garage door in the down position, begin by freeing the cables from the tension of the existing springs attached to the bottom fixtures. Take your time and work with patience—this is not a race! With the old fixtures removed, gently install the new ones, meticulously ensuring everything is aligned to avoid complications later on. After replacing the fixtures, give everything a thorough check to confirm that it's all secure and positioned just right before re-engaging the springs. And remember, if you ever feel overwhelmed or unsure, don’t hesitate to call in the professionals. The right experts can handle the job safely and get everything functioning smoothly, allowing you to keep your garage door system in top shape without risking your safety in the process.
GARAGE DOOR TOP FIXTURE REPLACEMENT: DIY LEVEL 4 - 7
Replacing garage door top fixtures is no small undertaking; it's rated between DIY LEVEL 4 and 7 depending on the specific type of fixture you’re dealing with. These fixtures play a crucial role in securing the door’s position and ensuring smooth operation. You'll want to approach this task with care and proper preparation. Start by ensuring your garage door is fully closed. This is vital for the next steps to keep everything stable and secure. When you remove the top fixtures, be cautious. They are the parts that hold your door section upright, and without them, the door could fold down unexpectedly. A nice tip is to replace the rollers while the fixture is off; this is an excellent opportunity to ensure everything is running smoothly to prevent the door from collapsing, it’s a good idea to support the door with a couple of sturdy clamps or a secondary brace. This will give you peace of mind and keep your project flowing without a hitch. As you proceed, gently wiggle the fixture free and take note of how everything is assembled. Make sure to keep all screws and components organized so that reassembly goes smoothly. When installing the new fixtures, ensure they're aligned correctly with the tracks and secure all screws firmly. After replacing the fixtures and the rollers, double-check their alignment and functionality before operating the door. Always prioritize safety throughout this process—wear gloves and safety glasses to protect yourself from any sharp edges or debris. With your new fixtures in place and the rollers replaced, you’ll notice how smoothly your garage door operates, providing both ease of use and peace of mind. Embracing this DIY project can enhance your garage door's longevity and performance, keeping your home secure while avoiding the costs associated with professional repairs. Plus, with every repair you tackle, you gain more confidence to take on future projects, ensuring your garage door remains in prime condition!
GARAGE DOOR MOUNTING ANGLE - KICKERS - HANGS REPLACEMENT: DIY LEVEL 2 - 4
When it comes to the garage door, ensuring the mounting angles, kickers, and supports are in top shape is essential for a smooth operation. These components are essentially the backbone, attaching your track and other mechanisms securely to the garage walls and ceiling. Over time, you might notice they can get loose or bent due to constant use or even shifts in your home's structure. The replacement of these components is generally rated at a DIY level of 2-4, making it manageable even for novice DIYers. Start by ensuring the door is in its fully closed position for stability. If you're dealing with any loose mounting angles, it’s a good idea to support the door temporarily to prevent accidents while you work. Once you're ready to replace the mounting angles, simply unscrew the old ones and install new ones securely, aligning them perfectly to ensure your garage door operates efficiently. Regular checks on these mounting components can save you from more significant issues down the line, as a well-secured door will function smoothly and quietly, providing the peace of mind every homeowner desires. Take your time, follow safety precautions by wearing gloves and safety glasses, and don't hesitate to call in a professional if you find the job more challenging than you expected. With a commitment to maintaining these often-overlooked components, your garage door can continue to serve you well without unnecessary hiccups.
GARAGE DOOR STRUT REPLACEMENT: DIY LEVEL 2-3
Replacing a garage door strut is a task rated at a DIY level of 2-3, making it accessible for those with basic handyman skills. This component plays a crucial role in reinforcing the top section of the door, adding extra support against the forces exerted by the garage door opener. It helps maintain stability, ensuring smooth operation while preventing warping or damage over time. Materials for this repair generally cost between $75 and $150, depending on the required length and gauge of steel for your specific garage door. When it comes to labor, you should anticipate additional costs ranging from $100 to $150. The entire job can usually be completed in a couple of hours, making it a relatively straightforward yet essential repair. By addressing the strut replacement promptly, you will enhance your garage door's durability and support its functionality, ensuring it continues to operate smoothly for years to come. Remember, maintaining your garage door's structural integrity is key to avoiding more significant issues down the line!
GARAGE DOOR SLIDE LOCK REPLACED: DIY LEVEL 2-3
GARAGE DOOR ELECTRIC-MAGNETIC LOCK REPLACED: DIY LEVEL 2-3
Replacing the manual and electric locking mechanisms is fairly easy, typically rated at a DIY level of 2-3. It usually involves dealing with just 2 or 3 wires that need to be placed correctly on the operator terminals. One crucial step is to ensure the locking pin or bar fully retracts so it doesn’t catch the track during operation. Additionally, we recommend making the mechanical locks safe to avoid accidentally locking them while using the motor—this helps prevent any potential mishaps that might leave you stranded outside your garage! With a little care and attention, you can enhance your garage door's security without breaking a sweat
REPLACING DECORATIVE HARDWARE (fake hinges/handles): DIY LEVEL 1-2
Replacing garage door decorative hardware is a fairly straightforward task that falls into the very easy category, typically rated at a DIY level of 1-2. This project can really enhance the appeal of your garage door and add a personal touch without much hassle. You’ll mainly be dealing with screws and simple tools, making it accessible even for beginner DIYers. Before you get started, gather your tools: a screwdriver or a power drill will do the trick, along with some magnetic screw holders if you choose to work with permanent screws. Using a tape measure to ensure everything is aligned perfectly is highly recommended—this will help you avoid any mishaps as you secure the new hardware in place.
Take your time when positioning the decorative elements. Remember, it’s all about enhancing the look of your garage door, so you want it to be as visually appealing as possible. After installing, give everything a good once-over to ensure it’s snug and secure. This simple enhancement not only boosts your home’s curb appeal but also protects the integrity of your garage door by ensuring that all components work harmoniously. Enjoy the transformation—it’s amazing what small additions can do for your space! Get magnetic decorative ones; they’re so easy to put on, and if you decide you do not like them or want to change them, you can.
GARAGE DOOR VERTICAL TRACK REPAIRED / REPLACED: DIY LEVEL 5-7
If you're facing a misaligned, bent, or worn-out track repair, expect to pay anywhere from $150 to $400, depending on the severity of the damage. This task isn't overly complicated, generally falling within a DIY skill level of 5-7. You might need to cut the track to fit properly, which means that attention to detail is crucial. You'll want to ensure that the joint alignment is spot-on, as any misalignment can lead to further issues down the line. Additionally, maintaining the correct distance from the wall is essential for allowing the door to clear it without obstruction. For cable repairs, you might find quality cable replacements priced between $50 and $75. When you factor in labor, the total for track replacement can range from about $250 to $350. Remember, it's typically a good idea to replace both cables simultaneously to keep the operation of your garage door balanced.
GARAGE DOOR HORIZONTAL TRACK REPLACED DIY LEVEL 8-10
When it comes to repairing or replacing a garage door horizontal track, it’s important to recognize that this task falls into the advanced DIY skill level, rated at an 8-10. This is primarily because of the crucial role the track plays in supporting the entire spring line, as well as ensuring the smooth operation of your garage door. Tackling this repair involves careful handling of components that bear significant tension, particularly when it comes to unwinding the springs.
Before you loosen the track, you’ll need to support the garage door securely to prevent accidents. Ensure that the door is fully closed, creating a stable base for your repair efforts. Once you’re set up safely, it’s crucial to unwind the springs with a precise approach, as they can snap back with a lot of force if not handled properly. Using winding bars can help manage the tension during this step and keep you safe. With the tension released, you can proceed to detach the old horizontal track. Pay attention to how everything is assembled so you can replicate it
accurately during reinstallation. As you replace the track, ensure proper alignment, as any misalignment can lead to further operational issues down the line. Position the new track securely and double-check that it’s firmly attached to avoid complications once the door is in use again. Given the complexity of unwinding springs, removing and replacing the track, plus ensuring everything operates smoothly and securely, many homeowners opt for professional assistance. It’s wise to prioritize your safety and the proper functioning of your garage door system. Depending on your location and the specific damage, you might expect service costs to range from $250 to $400, plus the cost of parts, which can vary based on the quality and manufacturer of the track. By investing time and care into this process or by calling in experts when necessary, you can ensure that your garage door remains a reliable feature of your home, enhancing both functionality and safety.
GARAGE DOOR BOTTOM RUBBER REPLACED: DIY LEVEL 3-6
When it comes to maintaining your garage door, one often overlooked aspect is the condition of the rubber seals. Over time, these rubber components can become dry rotted due to exposure to the elements, making them less effective in providing insulation and protection against moisture and pests. A simple yet effective way to rejuvenate dry rotted rubber seals is to use a tire dressing product during your biannual maintenance routine. This method is rated at a DIY Level 3, making it accessible for those with basic handyman skills. Applying tire dressing not only helps restore some flexibility and suppleness to the rubber but also provides a protective layer that can prevent further deterioration. To use this product, simply clean the rubber seals to remove any dirt and grime, then apply the tire dressing following the manufacturer’s instructions. You'll notice the difference as the seals regain some of their elasticity and functionality. Incorporating this step in your routine maintenance can enhance the longevity of your garage door’s seals, ensuring they remain airtight and effective while also preventing more costly repairs down the line. Keeping your garage door in top shape is essential for the overall safety and efficiency of your home, especially in areas like Tulare County, where weather conditions can be quite harsh. So don't skip this small but significant detail in your garage door care!
For more involved projects that ask for a detailed breakdown, replacing weather stripping could cost $60 to $85 for material and $100 to $150 for labor, which is relatively affordable.
REPLACE WOOD TRIM ON GARAGE DOOR JAMBS: DIY LEVEL 2-4
Replacing the wood trim on your garage door is a project that's pretty easy to tackle, usually landing in that DIY level of 2-4 sweet spot. This task not only makes your garage door look a whole lot better but also gives it that extra bit of support it needs to stand up to the elements. Depending on what type and design of wood you choose, the materials can cost between $150 and $350, with labor running around $150 to $300.When you're ready to dive in, precision is key! You know the phrase, “measure twice, cut once?” Yeah, that’s your best friend here. Before you even touch your saw, take a moment to carefully measure the area for the trim. Write down those measurements, double-check them against your existing trim, and make sure you’ve got the length and width just right. Doing this will save you from little mistakes that could turn this simple task into a headache. Once you've nailed down your measurements, it’s time to gather everything you’ll need. This usually includes some new wood trim, exterior-grade wood glue, screws or nails, and a solid sealant to weatherproof your work. Choose a trim that blends nicely with the current style of your garage door and is tough enough to handle the weather. With your materials in hand, you can start making those cuts. Whether you’re using a fancy electric miter saw or a trusty hand saw, remember to wear safety goggles to keep debris out of your eyes. Take your time with each cut to ensure clean edges. Then comes the fun part—installing! Position your new wood trim and secure it using the wood glue and screws or nails you’ve chosen. Just make sure everything is lined up right; you want it all snug and gap-free. We also apply a weather-resistant sealant around the edges of your new trim to give it added protection. This final touch will help keep it looking sharp for years to come. Taking care of your garage door’s wood trim is more than just a cosmetic fix; it’s about keeping your garage in great shape overall. So, grab those tools, tap into your inner DIYer, and enjoy that rewarding feeling that comes with a job well done!
GARAGE DOOR TROLLEY REPLACED: DIY LEVEL 5GARAGE DOOR
DRIVE BELT PULLEY REPLACED: DIY LEVEL 5
GARAGE DOOR DRIVE CHAIN PULLEY REPLACED: DIY LEVEL 5
The above repair costs are nearly the same skill set as the replacement of the opener below. Obviously, the material cost would be less, but remarkably, the labor is about the same. Trolley $150 to $250 depending on height of door, labor $150 to $300, Pullies are $10 to $25 and labor is $150 to $200, It takes a professional two hours or so to properly replace the Trolley and an hour to replace the pullies. Then, the limits are reset, and the door is tested and serviced. Make sure you ask (we always give a repair vs. replace cost estimate) what the alternative cost is $
GARAGE DOOR OPENER REPLACEMENT: DIY LEVEL 5 (see above)
Replacing garage door openers can really hit your wallet hard, especially with all the features and tech options out there these days. You can expect to shell out anywhere from $250 to $1,500 for a new opener, depending on the model you go for and any extra perks you’re after—like being able to control it from your smartphone or having top-notch safety features. On top of that, you also need to consider labor costs, which usually fall between $300 and $500. This can vary depending on how tricky the installation is and how experienced the technician is. While it might feel like a big hit to your budget, keep in mind that investing in a solid opener is super important for making sure your garage door operates smoothly and reliably. Openers typically have a lifespan of about 15 years, meaning regular upgrades can keep pace with technological advancements. In California, you are required to install a battery-backed-up motor when putting in a new door, as outlined by SB969. This not only ensures compliance with safety regulations but also offers peace of mind during power outages, ensuring you can still access your garage when you need it most. Understanding these costs is essential for homeowners to effectively budget for their garage door needs and avoid unexpected financial strain while ensuring that their garage door systems remain fully operational and secure. Regular maintenance and timely updates will save money in the long run by preventing larger issues down the line, allowing you to enjoy the convenience and security that a well-functioning garage door provides.
GARAGE DOOR INSTALLATION: DIY LEVEL 10
Installing a new garage door is rated at a DIY level of 10, and while it may seem daunting, it can be accomplished over a weekend with ample time, the right tools, and a good dose of patience. A professional can do 2 Doors and 2 Openers a day with a long lunch between. Preparation is key, so start by ensuring you have essential tools like a cordless power drill, wrenches, a stud finder, and, of course, your safety gear. Familiarity with the mechanics of garage doors is crucial; understanding the tracks, springs, and opener system will make the installation process smoother.
When it comes to materials, you're looking at a range of about $600 to $1,500 for a single-car garage door, depending on specific details. Factors such as size, style, brand, and any modifications required at the installation site will influence the total cost. Labor typically runs between $500 and $1,000, depending on the complexity of the job and the installer’s rates. In a standard installation without modifications, you can expect to pay around $500 to $800 for labor.
Now, if you’re feeling ambitious enough to tackle this project, starting early in the day will give you plenty of time to get everything done without feeling rushed. Engage thoroughly with the installation manual, and don’t hesitate to consult online resources or videos, which can provide valuable guidance. Remember, taking your time with measurements and ensuring everything is aligned properly can save you potential headaches down the line.
While it may be tempting to take on this task solo, don’t hesitate to call in professional help if you hit any snags along the way. Safety is paramount, and getting the job done right the first time will ensure your garage door operates smoothly and efficiently for years to come.
Start your project early in the day to allow plenty of time to complete the installation without feeling rushed. The process involves securing the door frame, properly aligning the panels, and ensuring that the door operates smoothly once installed. Don’t forget to double-check your measurements—precision is key! With careful planning, reading instructions, and maybe even watching a few helpful tutorials, you can transform your garage by replacing the door yourself. This task is an opportunity to gain hands-on experience and save some money in the process. However, remember that if at any point you feel uncertain or overwhelmed, it’s perfectly okay to call in a professional for assistance. After all, ensuring your safety and the proper function of your garage door is what matters most. So, gather your tools, summon your inner DIYer, and get ready to tackle that new garage door installation with confidence!
5. Benefits of Regular Maintenance: DIY LEVEL 1-2
Regular maintenance of your garage door system is a worthwhile investment. A systematic approach includes biannual serviceability checks, which often involve a 40+ point inspection. Regular lubrication of the rollers, hinges, and tracks prevents friction-related issues and reduces noise. By engaging in these practices, you not only extend the life of the components but also ensure reliable and quiet operation.
Regular upkeep is essential in keeping your garage functioning well amidst the dust and debris that can accumulate in Tulare County and the Central Valley community. Basic lubrication is very inexpensive; the cost of the lube and some time is about half an hour. The hard part is choosing the proper lubricant, and we'll go over the best options in the Preventive Maintenance section to ensure you're well-equipped to keep everything running smoothly. Plus, investing in regular maintenance can help you avoid those costly emergency
Regular maintenance of your garage door system is a worthwhile investment. A systematic approach includes biannual serviceability checks, which often involve a 40+ point inspection. Regular lubrication of the rollers, hinges, and tracks prevents friction-related issues and reduces noise. By engaging in these practices, you not only extend the life ofrgency repairs down the line! Understanding these costs will not only help you budget effectively but also make it easier to prioritize repairs as they arise.
Remember to service the garage door every six months, as this is not only beneficial but also the least expensive task on your to-do list. It’s a penny-wise expenditure; a biannual 40+ point safety and serviceability check-up, along with a lube and tune-up, typically ranges from $75 to $100 when performed by a qualified technician. This investment not only keeps your garage door running smoothly but also extends its lifespan.
Being aware of what each repair component entails can truly empower you, whether you decide to take the DIY approach or prefer to call in a professional. Having a good understanding of the average costs involved allows you to make informed decisions, preventing those sudden emergency repairs from placing a financial strain on your budget. After all, keeping your garage door in working order is essential for ensuring safety, functionality, and peace of mind in your home. You'll appreciate the added security, convenience, and potentially lower repair costs you'll face long-term by staying on top of regular maintenance.
In the world of garage doors, knowledge is indeed power. So, stay educated, keep an eye on any signs of wear and tear, and ensure that your garage door remains a reliable component of your home. By prioritizing regular maintenance and repairs, you’re not just protecting your investment; you’re also enhancing the safety and comfort of your living space. Plus, who doesn’t love the peace of mind that comes from knowing your garage door is functioning flawlessly?
Moreover, regular maintenance guards against unexpected failures that can lead to costly emergency repairs. It ensures all safety systems, like sensors and reverse mechanisms, function correctly, reducing the risk of accidents. This upkeep also supports energy efficiency by ensuring the door seals properly and is insulated to maintain the garage's thermal stability. Consistent maintenance not only saves money over time but also enhances the safety of your home environment.
6. Professional Repair Services in Tulare County
Residents in Tulare County benefit from a myriad of professional garage door services that cater to both emergency situations and routine maintenance needs. Companies like Garage Door Repair and Installations Co. offer 24/7 services, ensuring that any breakdowns are promptly addressed. Their trained technicians bring years of expertise to handle complex repairs that might be hazardous for DIY attempts.
Choosing professional services not only provides peace of mind but also guarantees that the repairs meet safety standards and are executed efficiently. Additionally, these services come with warranties on both parts and labor, offering further protection for homeowners. Whether you require a quick fix or a comprehensive replacement, Tulare County's dependable professionals offer quality assurance and expert guidance, keeping your garage door in peak condition.
Maintenance Tips to Prolong the Life of Your Springs
Regularly checking and lubricating your garage door springs is a breeze, and it can really help keep them in good shape. It’s also smart to have pros take a look at them once a year to make them last longer. When you do a quick inspection yourself, just make sure the springs are tight and watch out for any rust or weird shapes. A little lightweight oil on the springs can cut down on friction and keep moisture at bay, ensuring everything runs smoothly. And remember, balance is key! To check this, close the door (definitely not while it’s open), disconnect the automatic opener, and see if you can lift the door halfway. If it doesn’t stay put, that could mean the springs need a little adjustment, or if they’re older than two years, it might be time for a replacement. Oh, and don’t forget to give your garage door opener’s settings a once-over, especially the safety reverse feature. A smoothly working opener helps reduce the load on the springs, making them last longer.
Staying on top of maintenance and jumping on any issues quickly can work wonders for your garage door springs. Plus, knowing what usually leads to broken springs helps you spot problems early and keep everything running smoothly. Manufacturers recommend having a semiannual safety and serviceability check done by certified techs; this smart move can really save you time and money down the line. We’ve got a stellar Lube-and-Tune-Up service to keep your garage door moving effortlessly. Right now, it’s just $75 for the first door, and only $50 for any additional doors if we do them on the same day—how great is that? If you want even more savings, check out our year-long maintenance plan for just $100 per door, covering two visits—that’s a $50 savings! So, whether you've got one garage door or a few, keeping them all serviced regularly helps boost their performance and protects your home. Don’t let little issues grow into big problems; keeping your garage door in great shape is key to smooth operation and peace of mind. With just a bit of care, your garage door will be there for you for years! Take your garage doors to the next level with our semiannual inspection—it’s essential! Consider our Lube-and-Tune-Up service for just $75 for the first door, and only $50 for each additional door on the same day. Plus, if you sign up for our 1 Year Maintenance plan at $Current cost is $75.00 for the first door and $50.00 for each additional door at the same address.
- We also have 1 Year Maintenance Programs which currently costs $100 per Door and covers 2 visits for 1 Door at 1 address 6 months apart. (A $50.00 savings) Serviced on the same Day.
- 2 Door Home with 2 Maintenance Programs costs $200.00 2 Visits for 2 Doors at 1 address 6 months apart. (A $100.00 Savings) Serviced on the same Day.
- 3 Door Home 3 Maintenance Programs cost $300.002 Visits for 3 Doors at 1 address 6 months apart. A $150.00 Savings Serviced on the same Day.

Why Choose Garage Door Repair and Installations Company?
-
Book Online Today For An Immediate DiscountBook an appointment with our team today to get 10% discount on material.
-
Veteran-Owned BusinessAsk about our 15% veteran & first responder discount!
-
Certified Technicians, Licensed & Insured BusinessEntrust your garage door to a licensed & insured business. All of our technicians are IDEA certified.
-
Warranty on All of Our ServicesWe offer a 2-year warranty on mechanical parts and labor, 6-year standard warranty on springs, upgradable to 10-year and 20-year warranties.